Sunday, February 11, 2018

Human Anatomy Fundamentals


Image result for ahow to draw anatomy tutorialThis post will teach you about the fundamentals steps on how to draw human anatomy. The steps that will be post here are based on what i've learn in some articles. So let me share some basics so that you can gain some knowledge and improve your skills also. 


This is one of the best tutorial of algaegoblin :)


STEP 1


First of all, if you want to learn faster you should draw using traditional tools.  It may seem a stupid or banal rule but it is not. 
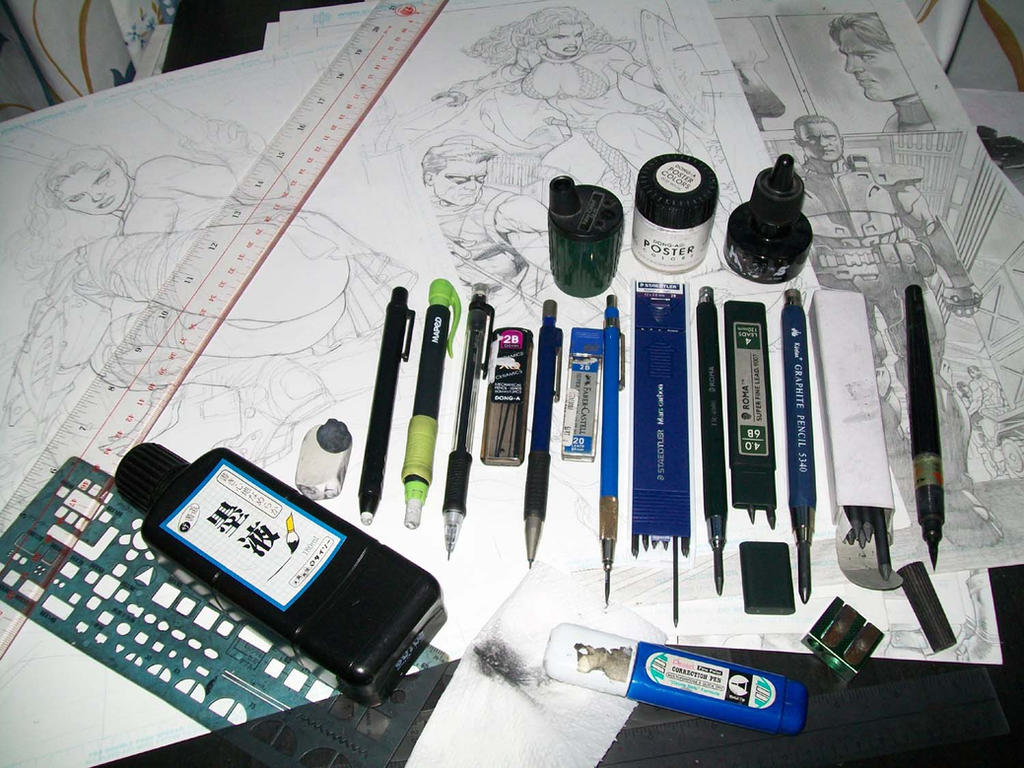
You will need a piece of paper and a pencil, preferably a medium-hard pencil or HB ("H" stands for "hardness," while "B" stands for "blackness"). If you  have already familiarity with this hard drawing medium you could obtain different soft pencils instead: B, 2B and 4B will be fine. A putty rubber and a white rubber from a good brand will work fine. 
However, I'm not here to describe which tools are better for drawing traditionally, and for me a hoe would work fine as well: it's the passion that counts!

My tools by thepunisherone

 Now that you have a pencil and F4 paper (F2 is less thick and if you erase often you could ruin it, that's why F4 is ideal) you can start your work. You can also make out with A4 paper which is thicker than normal,  otherwise you will pass the sheet if you use a hard mine (or if your hand is too heavy, if you know what I mean...). 
Well, now that you have the tools, sharpener included, get in a bright spot of your house, preferably on an inclined surface (otherwise your future drawing will look in perspective, and you may not be happy with the result!) and copy the hand your not using for drawing. Try not to erase too much. Try to grasp the structure of your hand through many sketches in which you should only draw the outlines of your hand and fingers, you should forget about the shading for a moment. 
Fill the paper with these sketches of your hand in different poses and please include your wrist if you can. Continue your workout every 2/3 days (preferably daily) for 2 weeks, what am I saying?  Do it until you could see significant improvements! 
Write the date on each work you have done and keep them carefully without rubbing them. The first step to be a good artist is to give value to your works. When the hand really looks like a hand and not a mass of sausages then you're ready for Step 2.

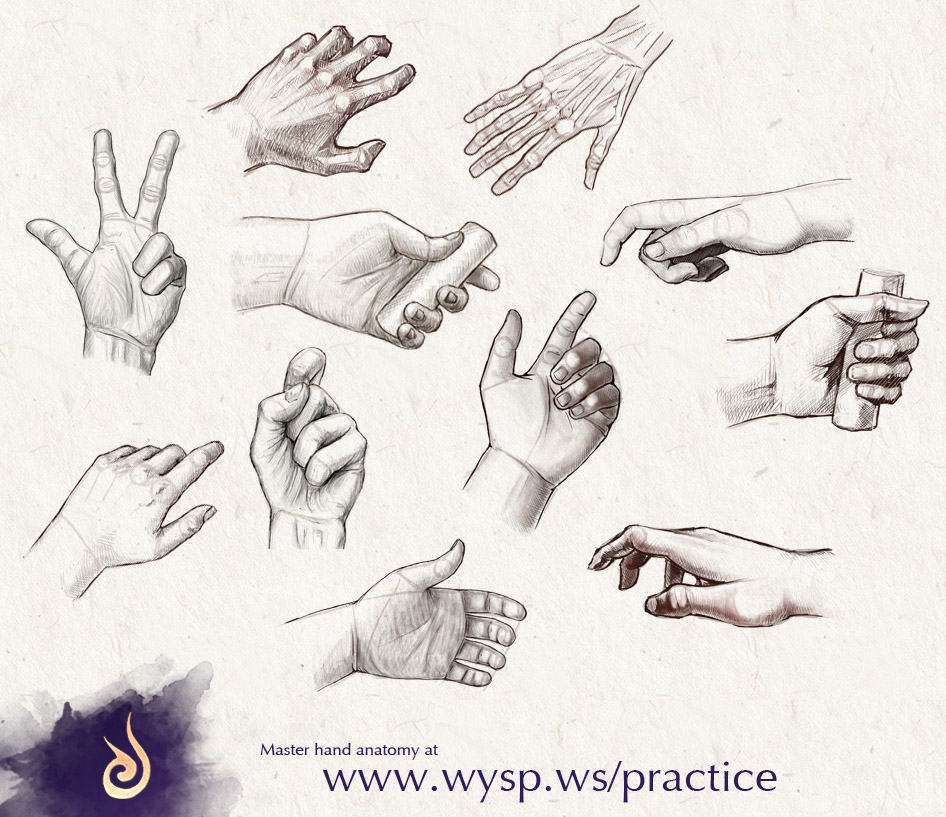
The result will be similar to this, only the folds of flesh and contours of the hands should be visible.
HANDS training by Washu-M

Hand proportions work this way...

Hand Tutorial -Tips+Reference- by Qinni Hand Tutorial 2 by Qinni

STEP 2


So now we better move to the second point. 
Ok guys, do you remember your own hand? That hand you copied so many times, that fist, that cramp that came while you deformed it? Here you are, you should repeat the procedure but this time you will not have to copy only the outlines of your fingers. You must work hard and point on your hand the dramatic light of a lamp, because this time you should draw your hand and shade it. 
If you are drawing using a HB  pencil then shade using a B or 2B. You will realize soon that it is not so difficult to find the darkest points: the hard part is not to make the whole drawing uniformly black or uniformly gray and creating well balanced halftones. 
You may find some difficulties, yeah right! all normal, because in fact you're seeing your hand in colors (as long as you're not color blind) and you're just simplifying your hand colors using the greyscale instead. So, don't give up! It was hard for everyone at the beginning.
Repeat this exercise every 2/3 days until you can see a clear difference between the first hand  (remember to write the date on the drawings!) and the last hand you drew. Are you satisfied with your improvemente?  Good, because you will have more fun following STEP 3. 

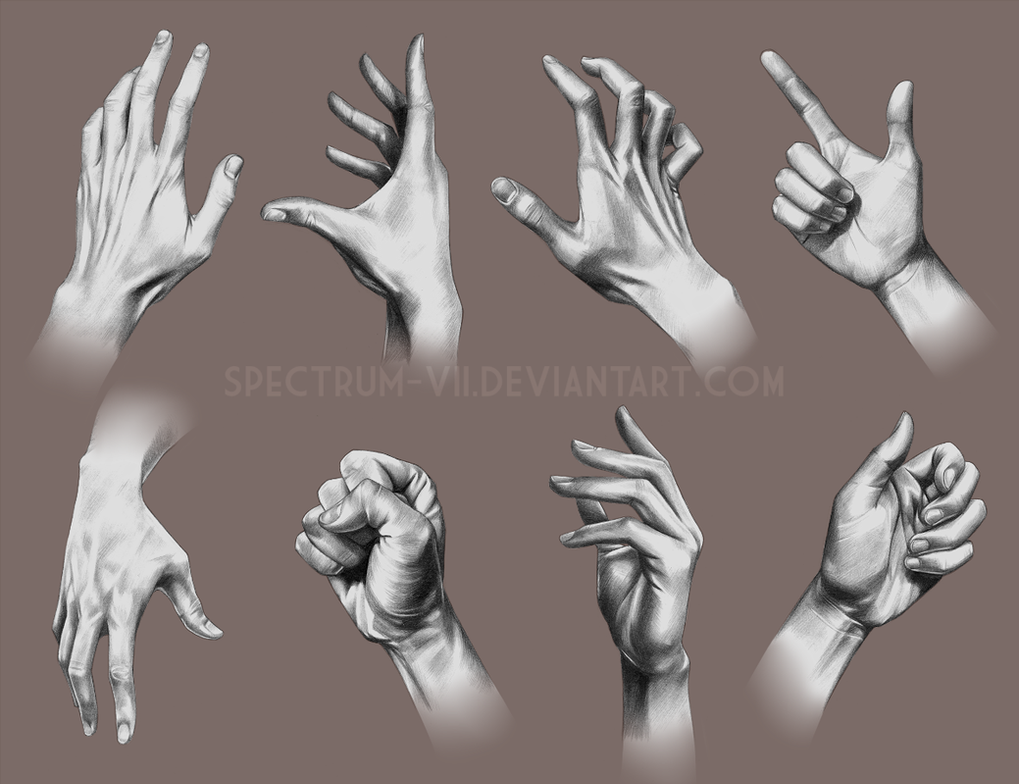
These are practical examples of a good result.
  A study in hands 2 by Spectrum-VII
Hand anatomy by Elthenstorm


STEP 3


Since you are already conversant with your left hand (or right that it is) and you say you know it by heart (if you say so...), now I'm asking you to take your colored pencils and do an experiment. This time I'm asking you NOT to do a preliminary sketch in pencil of your drawing: just draw one or both of your feet, using colored pencils only on semi rough paper F4 of different colors (I recommend a white, a grey, a blue and a black for a good start). Again, do not stop until the result satisfies you. Write the date on the work because now the interesting part begins.
The result should be similar to these, of course in colors.
FEET sketches by Washu-M Feet Study 2 - Steps by irysching

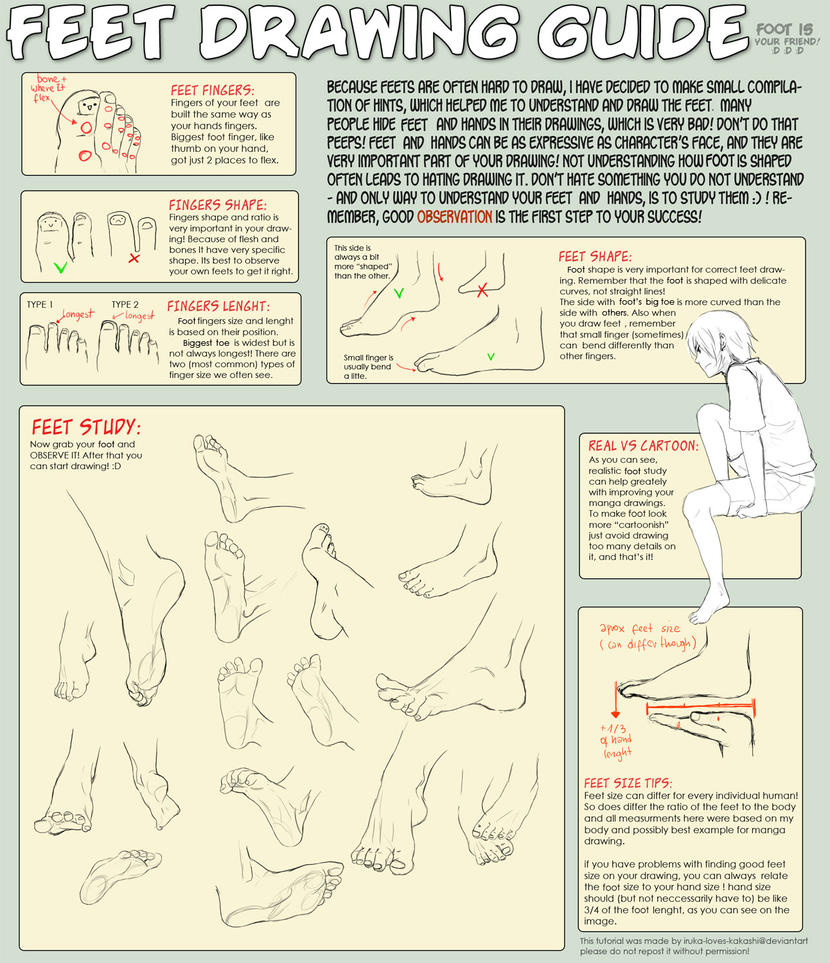
Feet proportions works this way...
+TUTORIAL-Feet drawing guide+ by goku-no-baka

Thursday, February 8, 2018

Steps on how to use oil pastels


This post will teach you on how to use oil pastels. Based on the article I've read, there are 7 steps on how to use it properly. So i would like to share it also to you guys so that it will helps you to understand what are the fundamentals of using this art materials.


1. Choose a subject to draw and how large you want it to be. You should start with an easy subject like a dog, a house, or a lake if you're a beginner. If you're up for a challenge, you might want to choose something harder, like a person or landscape.

2. Once you have chosen a subject, get out some paper to draw on. Depending on the size you want your drawing to be, choose a paper size that will fit your subject without leaving too much or too little space.
  • After you finished that, try thinking what hue or texture you want the paper to be. This is optional, but good artists can use different paper hues and textures to create different effects for their drawings.

  • Also, note the thickness of the paper. A fairly thick kind of paper is recommended because you would need to press down a lot when drawing with oil pastels so thinner papers may rip under the force. There are many kinds of paper, so try choosing a kind that works best for your goals.
3. Take two sheets of the paper you have chosen: one for testing on, the other for the actual composition. On the testing sheet, draw something smallish. Don't draw too many details, this is only for testing. It will help you get used to the feel of the paper and the pastels before you start your actual artwork.

4. Lightly sketch an outline of the subject on the main paper with a pencil so that you can erase the lines if you made a mistake. Don't worry about the details yet. The details aren't so important at the moment, however, later they will make the drawing more beautiful! So try adding little details later!

5. Add colors to your drawing with your oil pastels. Plan out your color schemes and which areas you would want to blend colors. Start out by coloring the drawing roughly, and adding more details as you go along.

6. Add more layers of colors to blend them together. Also, try blending them with your finger or an artist's tool to move the oil pastels around the drawing. Using your finger is the recommended method.

7. Have fun. Drawing with oil pastels may be hard, but you can have fun too! Don't think that if you failed you will never be able to make art. Remember that this was still your first attempt and that everyone needs practice to do something well.


Have a good day!

Wednesday, February 7, 2018

How to draw a 3D


This post will show you how to make simple 3D drawing. I'll share some videos of one of my idol Chris Samba. If you dont know who is this man, then you should know. Many of his videos will improve you a lot !!


Must watch his some videos below regarding 3D drawing/illusion.


Tuesday, February 6, 2018

7 Steps on how to draw a nose

So this post guys will teach you on how to draw a nose in just 7 steps. We all know that sketching a nose will consume much time if you don't know the techniques. So I'll share the steps on how to make it easily. This is probably the steps that artist uses the most.


Take a look on the picture first:


Step 1: Start with a circle. Draw a circle for the ball of the nose and 2 curved lines on each side for the bridge. 

Step 2: Draw simple guidelines for the nose shape. ...

Step 3: Shade around the nose bridge and tip. .

Step 4: Draw the nostrils. ...

Step 5: Shade the nostrils. ..

Step 6: Shape the nose. ...

Step 7: Blend your shading.


I hope this steps could help you.

Monday, February 5, 2018

Hair Technique using Glue Stick

Every artist has a technique on how to make their hair strand more realistic.This post will be focused on how to make a hair strand using glue stick. So I just want to share the techniques of my co-member in Guhit Pinas , Mr. Lo Ven. I amazed when I see his post with his own techniques on how to make his hair strand. So this is it.


STEP 1. Sketch the outline of your reference.


STEP 2. Make a strands/rendering, but make sure that it is based on right direction of thye strands.


STEP 3. Using brush and charcoal powder, darken the hair. But make sure that the highlights park shoudn't be darken.


STEP 4. Take a look at this:


STEP 5. Cut the glue stick into sharpen edges.


STEP 6. Use the glue stick as the eraser to make white hair strands. Make it soft to avoid struggle in paper.


STEP 7. For the short hair part, make a strand to array.


STEP 8. Using brush and charcoal powder, darken it.


STEP 9. Make use of glue stick to make white strands.


STEP 10. So this is the results!


I hope this techniques by Lo Ven could help you!

Sunday, February 4, 2018

Skin tone Tutorial

Hello Guys! So I'm here again to share some tips regarding skin tone. Many artists especially newbie there have problem in making proper skin tone. So this post will be focused on skin tone on how make it realistic and more vibrant.

Take a look about the example below :

Color Blending


According to Antonella Avogadro, Layering and blending are the two most important methods in skin tone using coloured pencils because it play a important roles in your artwork.


LAYERING AND BLENDING

Before we talk about colors and skin, I have two important tips for you that I think will help you work better with colored pencils no matter the subject. The two important concepts to remember in order to paint vibrant images with pencils are layering and blending. Combining these methods of applying colored pencils will prevent your artwork from looking flat or one-dimensional.It is best to work up a painting with multiple layers of soft pencil strokes. Apply all your colors (highlights, midtones, shadows) in four to six layers of soft shading. Once you are close to the look you are aiming for, apply one last layer of colored pencil, but this time press hard on it to seal the colors and blend all of the layers underneath together. This is the secret to creating a smooth look.


In doing your skin tone, it is normal to take much time to make it better results, you need to have patience in yourself for better results. Always put on your mind that "Faster is Slower"
Practice and Practice until you become an expert in making skin tone.


x

Saturday, January 27, 2018

Understanding Pencil Grades and Stroke Techniques


Pencil Grades

For all the newbie in terms of using graphite pencils, you need to understand first the pencil grades and strokes. Before you come up with your artwork using graphite pencils, I have some tips for you to achieve your goals on your drawing. Understanding pencil grades and stroke techniques are your key to make a smooth and realistic drawing. 


You can tell how hard or soft
 a pencil is by looking at the combination of letters and numbers printed on the end of each pencil.

H: Hard
F: Fine Point
HB: Hard Black
B: Black

Proper stroke of your shading can produce good results. There are many kinds of stroke techniques in shading. Here are some basics you need to know for you to understand how to shade properly your drawing.

Hatching is an artistic technique used to create tonal or shading effects by drawing closely spaced parallel lines.
Smudging is the next step after mastering the technique of line drawing. Smudging the graphite means that you have to work less hard at shading
Curve Hatching When hatching is used, the lines drawn generally go in the same direction and are mostly parallel with each other. Sometimes, the lines may curve slightly or even a great bit depending on the contours of the object.

After knowing the importance of these elements, you can start your drawing and shading. Mastering the pencil grades and stroke techniques will improve you a lot. 


Human Anatomy Fundamentals

This post will teach you about the fundamentals steps on how to draw human anatomy. The steps that will be post here are based on what i&#...